Adventure Guide
Maps
You can also find links back on my home page.
Adventure 13-12
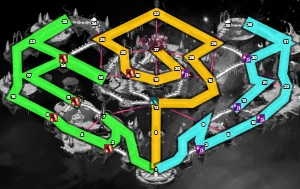
Fast
Wait-free and easy routes for left and right, but you leave the most difficult to the third player.
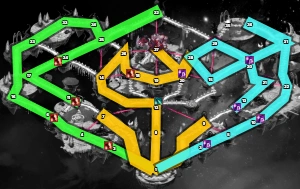
Chad
Chad starts with the most difficult route (center) and kills the boss. Gg Chad!
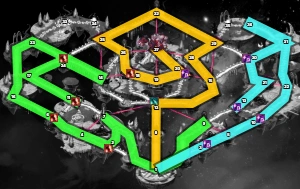
Two Players (Optional Weak Third)
Routes for two players only - three chests. A third player can join in for the fourth chest with a very easy route.
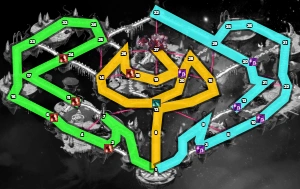
Outdated
Not recommended. Outdated but still popular routes.
Adventure 13-11
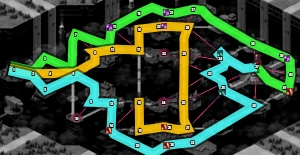
Default
Start with the center route to unlock the rest.
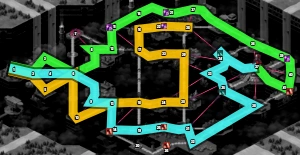
Balanced
Start with bottom, then middle. Everyone has room for error, but the first player has soft waits.
Adventure 13-10
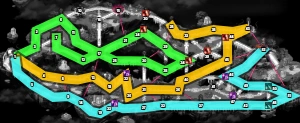
Variant A
Both variants are equivalent.
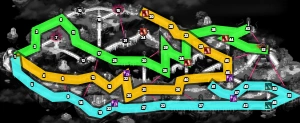
Variant B
Both variants are equivalent.
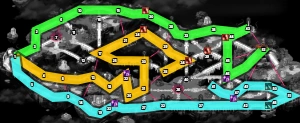
Chad
Chad takes on the middle route and forces his way through buffs, to give one margin of error to top.
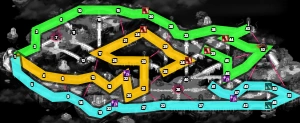
Strong Guild
For guilds strong enough to take on buffed spots: it gives one error margin against inattention.
Adventure 13-9
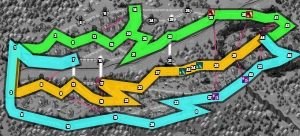
Fast
Fast and easy routes: Center opens the way for everyone else.
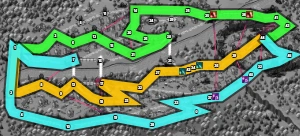
Fast++
A variant of fast routes that gives room for one error, but top will have to force his way through a healing buff.
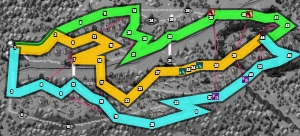
Chad
Chad starts the adventure and clears the central route by forcing his way on #8. Top and bottom get simple routes with room for errors.
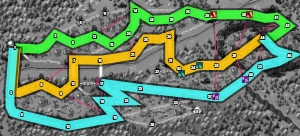
Outdated
Easy routes that take the big team buff on #16, but they require you to wait for others. Pretty popular also.
Adventure 12
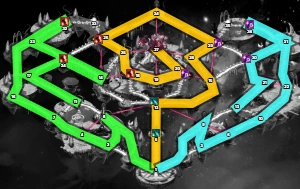
Fast
Wait-free and easy routes for left and right, but you leave the most difficult to the third player.
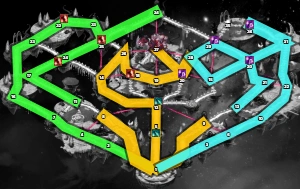
Chad
Chad starts with the most difficult route (center) and kills the boss. Gg Chad!
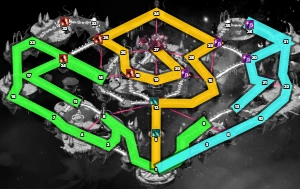
Two Players (Optional Weak Third)
Routes for two players only - three chests. A third player can join in for the fourth chest with a very easy route.
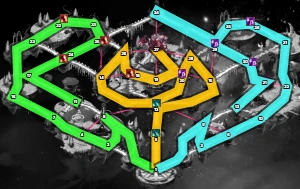
Outdated
Not recommended. Outdated but still popular routes.
Adventure 11
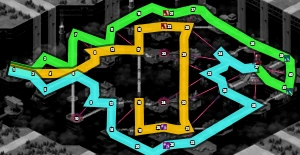
Default
Start with the center route to unlock the rest.
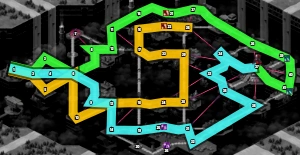
Balanced
Start with bottom, then middle. Everyone has room for error, but the first player has soft waits.
Adventure 10
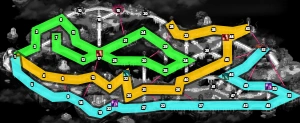
Default
Variant A: both variants are equivalent.
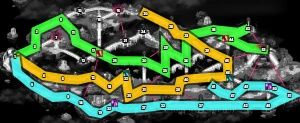
Default
Variant B: both variants are equivalent.
Adventure 9
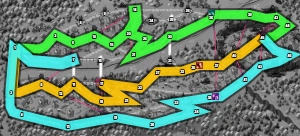
Fast
Fast and easy routes: Center opens the way for everyone else.
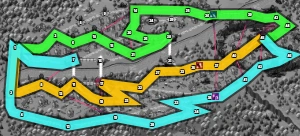
Fast++
A variant of fast routes that gives room for one error, but top will have to force his way through a healing buff.
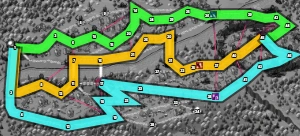
Easy
Easy routes that take the big team buff on #16, but they require you to wait for others. Pretty popular also.
Adventure 8
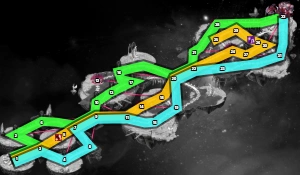
Safe
Safe routes with many waits. Middle is the most difficult route.
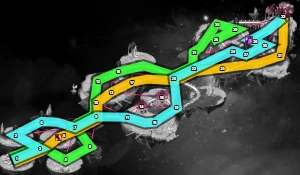
Chad
Chad starts and clears the way alone with his strong team. Followed by middle, then right.
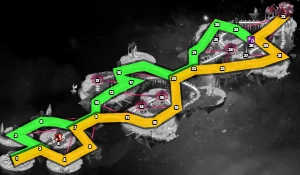
Two Players
Two players route. Start with right.
Adventure 7
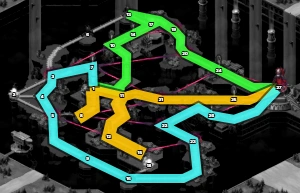
Safe
Standard routes: start with the top or middle ones.
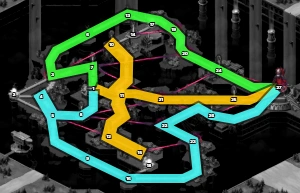
Fast
Routes with fewer waits, but you (middle) leave the top player with the burden of forcing their way through a buff.
Adventure 6
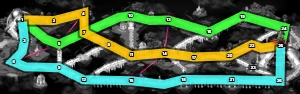
Default
Start with the top-then-middle route: no wait needed.
Adventure 5
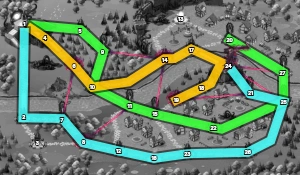
Fast
Fast routes with no waits: start with top, then bottom, then middle.
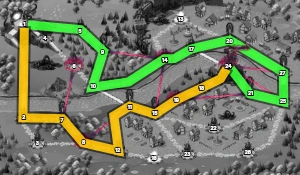
Two Players
A variant for two players. Start with top.
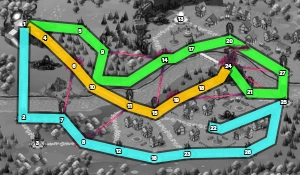
Outdated
Not recommended. Outdated routes, with some waits.
Adventure 4
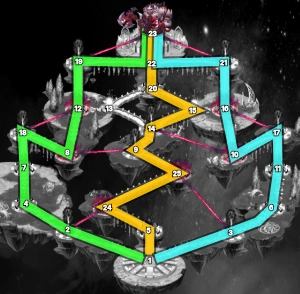
Default
Strong players should start with middle if they can force their way. Others should start with left.
Adventure 3
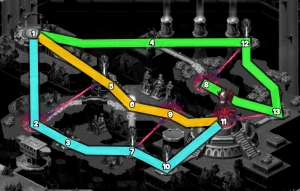
Safe
Safe routes that leave everyone room for failure.
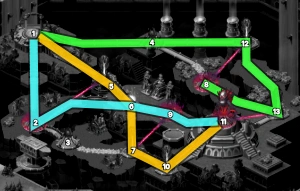
Fast
Start with middle - no wait needed, but the top route cannot fail.
Adventure 2
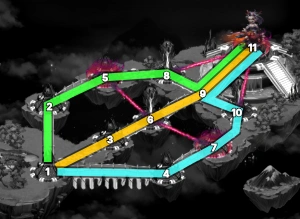
Default
Standard routes. Start with the middle one.
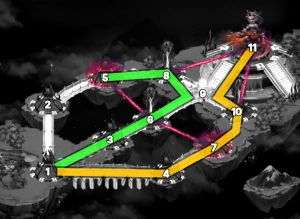
Two Players
A version for two players only - no failure allowed unless a third player joins.
Adventure 1
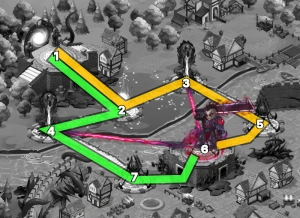
Default
Most useful map ever.
Advices
It is very important to reach the higher-level adventures as fast as possible, since an adventure 13 rewards about 200 chaos particles on average
Do not stay at lower-level adventures for pet gems: it is better to move on and purchase them with particles
Portal Charges
You get one free portal charge everyday, but only if you have less than three
You get another one from the last prestige reward
It is advised to leave your completed adventures hanging for the next day, so that you always start your day by raiding. This way you can still complete one daily adventure if things go wrong
Actually you can do even better by delaying the raid to exploit the time window between the guild day start and your personal day start
Cooperation
Closing your adventure does not close it for other players
If you enter an adventure where the boss has been killed, you will immediately be presented with the rewards, even if the adventure is incomplete. However you can still close this screen and fight the remaining spots. Or press escape and end it later
Conversely, killing the boss does not terminate the adventure for anyone. However they may not know it on new servers
Difficulties
Higher-level adventures have spots with resistances against some damage types, up to 100% in adventure 13. This affects what characters you should raise, see the section below
Enemies benefit from random daily buffs, you can see them in the screen where you create an adventure. They can significantly alter the difficulty
If you struggle in adventures, consider a blitz team, such as one with Dante in front with Cain
Forcing Damage Resist Buffs
If you do not want to wait, you can force even a 95% damage resistance buff by stunning the enemy, and other


Adventure 13
Maps
It is a stronger version of maps 9-12: a13-9, a13-10, a13-11, and a13-12.
The daily map is chosen randomly, and it is common to all players. You can see the map of the day by looking at the picture of the boss on the portal (see below)
New players will want to avoid the 13-10 map, so make sure to have the previous day's adventure still hanging so that you can avoid it. Once you become strong enough though, you can just force your way through buffs and remove the need for synchronization.
Immunities
You will need to be able to deal at least two damage types because of complete immunities to specific damage types, visible among the buffs list as


 A good team for that is Dante+Orion
Characters that apply buffs or additional damages will not if their primary damage type is ignored: Augustus, Seb, Keira, Galahad, Yasmine, Iris, ...
Recommended Team
Thanks to this team I beat my first lv13 adventure with just 650k team power. Dante alone works miracles with the help of Cain. I still use it every day for adventures.
Ideally you should remove Augustus against pure immunities, and play manually against Rufus in case something goes wrong. In practice, though, the base team still works 99% of the time even if you do not bother.


Portals
The portal displayed at the Sanctuary indicates the adventure of the day.
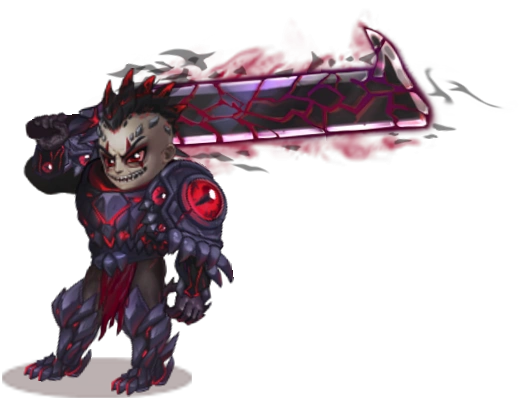
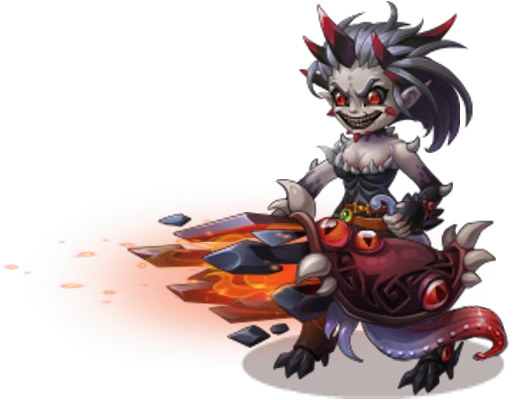
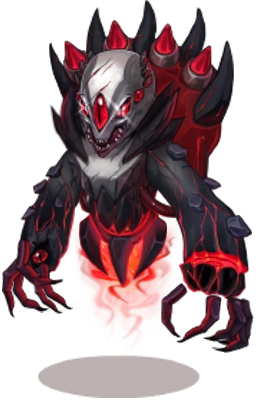
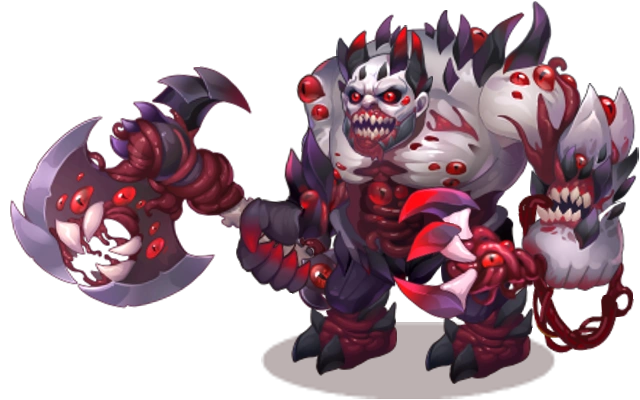
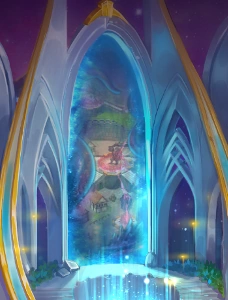 | 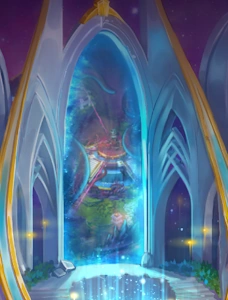 | 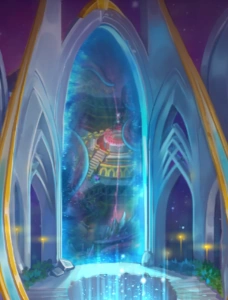 |  |
| a13-9 | a13-10 | a13-11 | a13-12 |
| Galahad | Ginger | Orion | Cleaver |
Bosses